Vinyl wraps have become a popular choice for car enthusiasts who want to change the appearance of their vehicles without committing to a permanent paint job. However, as trends evolve or personal preferences change, the need to remove a vinyl wrap may arise. Properly removing the vinyl is crucial to avoid damage to the car’s paint and ensure a smooth transition. In this guide, we will explore the steps and techniques for effectively and safely car wrap removal.

• Materials Needed
Before you begin the vinyl wrap removal process, gather the necessary materials to make the task more efficient:
1. Heat Gun or Hair Dryer: To soften the adhesive and make the vinyl more pliable.
2. Plastic Razor Blades: To gently lift and peel off the vinyl without scratching the paint.
3. Rubbing Alcohol or Adhesive Remover: For cleaning any remaining adhesive after the removing vinyl wrap.
4. Microfiber Towels: To wipe away residue and keep the car’s surface clean.
Step-by-Step Car Wrap Removal Process
1. Choose the Right Conditions:
Perform the vinyl wrap removal process in a shaded area or on a cloudy day. Avoid working in direct sunlight as the heat can make the vinyl more challenging to peel off. Ensure the ambient temperature is moderate, as extreme cold conditions might affect the pliability of the vinyl.

2. Start with Heat:
Use a heat gun or hair dryer to warm up a small section of the vinyl. Keep the heat gun at a safe distance to prevent overheating. The heat softens the adhesive, making it easier to peel off the wrap. Begin heating from the center and gradually move towards the edges for uniform softening.

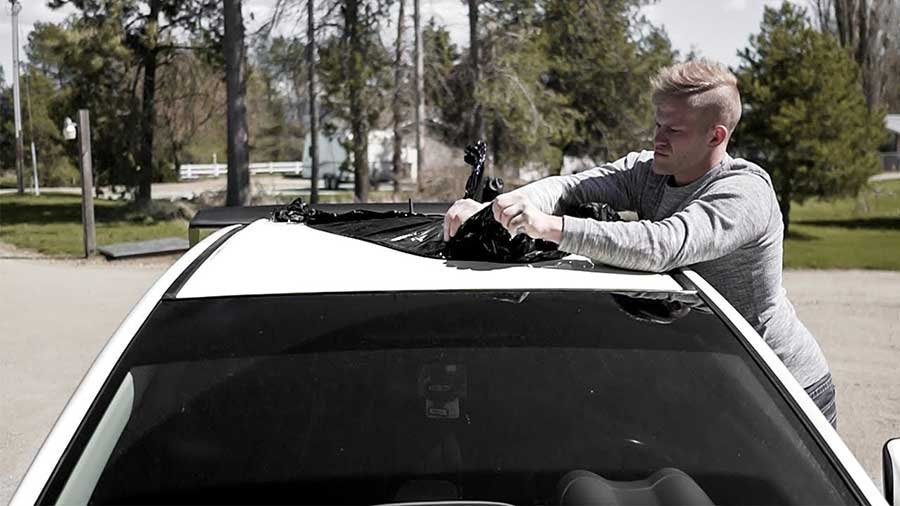
3. Peel Off the Edges:
Begin peeling off the edges of the vinyl at a 45-degree angle. Take your time and continue applying heat as needed. If the wrap tears, reheat the area and proceed with caution. Consider using slow, deliberate motions to ensure a controlled peel without causing unnecessary stress on the material.

4. Work in Sections:
Divide the car into manageable sections and tackle one at a time. This ensures thorough removal without rushing the process. Start with the least visible sections to practice your technique before moving on to more prominent areas.
5. Use Plastic Razor Blades:
Gently lift the edges of the vinyl with plastic razor blades. Avoid metal blades, as they can scratch the car’s paint. Peel the vinyl away gradually, applying heat when necessary. Use an upward motion to minimize the risk of scratching, and change blades regularly to maintain effectiveness.

6. Remove Adhesive Residue:
After the removing vinyl wrap, you may encounter adhesive residue. Use rubbing alcohol or adhesive remover on a microfiber towel to wipe away any sticky remnants. Take care not to damage the paint during this step. For persistent residue, apply the solution and let it sit for a few minutes before gently wiping.

7. Clean the Surface:
Once all the vinyl and adhesive are removed, clean the car’s surface with a mild automotive detergent and water. Dry it thoroughly with a clean microfiber towel. Consider using a second clean microfiber towel for a final polish to ensure a spotless finish.

8. Addressing Challenges:
Be prepared for challenges such as stubborn adhesive or difficult-to-reach areas. Adjust your approach based on the unique characteristics of your car, ensuring a meticulous vinyl wrap removal process. For stubborn spots, revisit them with heat and employ a gentle rocking motion to encourage adhesive release without causing harm.
9. Final Inspection:
Before concluding the process, conduct a comprehensive visual inspection. Ensure all adhesive residue is removed, and there are no signs of damage. Touch up any areas that require additional attention to achieve a flawless finish.
Read more
• Vinyl wrap and everything you need to know about it
• Pro Tips for Success:
1. Patience is Key: Rushing the process may lead to mistakes or damage. Take your time to ensure a clean removal.
2. Consistent Heat Application: Maintain a consistent heat level while peeling off the vinyl. This prevents uneven vinyl wrap removal and reduces the risk of paint damage.
3. Proper Storage of Tools: When not in use, store tools like the heat gun and plastic razor blades in a safe place to avoid accidents and damage.
4. Consult Professionals if Unsure: If you’re uncertain about the car wrap removal process, consider seeking professional help. They have experience and tools to ensure a smooth removal without harming the car.
• Enhancing the Conclusion:
Navigating the intricacies of car wrap removal is an art that demands attention to detail and adaptability. As you embark on this journey, remember that each vehicle may present unique challenges. By investing time and effort to master the art of proper removal, you not only preserve your car’s aesthetic appeal but also gain valuable skills for any future customization endeavors. So, whether you’re preparing for a new vinyl wrap or returning to the car’s original finish, the meticulous approach to removal ensures a seamless transition and a refreshed appearance for your prized possession.